顯示具有 Apple 標籤的文章。 顯示所有文章

2015年2月28日 星期六

iPhone 6 爆Monitor 維修

28-Feb-2015 今日跌爆左個iPhone 6以下是維修時需知,價錢及程序!  跌爆Monitor當日好急,返左屋企做完Backup即刻就去左Retail Store,點知排隊都只係做Booking預約,約左2-Mar-2015。
2-Mar-2015 預早11:55己經去到Apple Store,姐姐仔來幫我登記及料解情況,其實視乎損壞情況啦,因為隨爆Mon外,機身多處位置都花了,如果沒有存貨可更換手機的話,我就換Mon算啦,適逢有貨所以俾$2368成部換左去,當然換機佢一定唔係俾賣街packing的iPhone你,佢係俾維修更換用packing的iPhone,即係Apple佢地認證過全新或番新既iPhone,呢點大家要留意因為係番新所以要驗清楚,收左貨出左門口有問題你行返入去佢唔會換俾你,只會做維修,我收到第一部機即彈,Screen內有一粒黑點的塵,第二部才收貨。


 維修程序
   
- 先致電Apple Support預約維修 iPhone, 如果你 Walk-in 去Apple Shop除非冇人做維修啦,如果唔係你去到就係排隊做booking.

- 如果手機仲可以開到機請先用電腦 iTunes把 iPhone Backup一次先,如果你平時做開個Backup就好快攪掂,如果你從來冇做過,個backup可能要做1-2個鐘視乎你有幾多Data。#註1

- 預約好日期維修當天需準時到Apple Retail Store 交付手機驗查及報價,維修約需時48小時,如更換手機則視乎存貨,有存貨可以即時更換,費用一般如下 :

以下是保養期內意外跌爛iPhone Monitor Screen費用
$848 更換 iPhone Screen (如iPhone Case灣曲導致不能更換Monitor Screen則需整部手機更換。
$2368 更換整個 iPhone 手機 (注意是維修用的全新或番新iPhone,包裝與零售版本不同)
$868及$2368基本上係與保養無關,即係買機到手未滿7天/未滿一年/過晒保養都係呢個價錢,因為跌爛並唔係本身機件問題,係人為損壞。
$548 更換整個 iPhone 手機 (只限 AppleCare+)
*** 任何並非人為損壞Apple保養是包含在內的,如果你的iPhone是明顯坐灣左,應該係計算在人為損壞,如果好輕微灣曲如玉眼不能分辨出來,我個人認為可以懶產品質量問題要求維修或更換,iPhone內多處位置都有試水紙,如因入水導致損壞係講唔過的。

 - 維修或更換完手機回家用iTunes restore backup便可以還原所有資料。


 (以上係2015年我更維修iPhone6價錢參考好啦)


AppleCare Plus
如果你係全新手機及購買未滿60天,你可以購買額外既AppleCare+ $688 , 需另外俾$548元意外保障就可以更換成部手機,但只限兩次!抵唔抵就視乎你點玩,如果你係裸跑朋友,我建議買機時一定要買埋AppleCare+,裸跑一至兩年部機一定由頭花到尾,介時換其他手機想把現有手機乾乾淨淨俾屋企人用俾多$548就ok, 或你有心理準備一定跌爛AppleCare+一定抵D。


 *** 注意必需在購買手時一拼購買或購買後60天內到Retail Store購買,Retail Store會驗查你購買紀錄及驗查手機沒有損壞才能成功購買。


#註1
關於備份,所有的備份是不會儲存密碼的,當回復手機後,電郵帳號,Wi-Fi密碼等等都需要重新輸入密碼,另外App內的設定大部份都會同備份前相同,但如果是Game的話如Chain Chronicle是必需用引繼才可以取回帳號,其他如Puzzle & Dragon則可以放心備份回復。

2015年1月19日 星期一

How to setup Linux/ABC e-mail account to your iPhone's

1. Click "Setting" on your iPhone's

2. Click "Mail, Contacts, Calendars"

3. Click "Add Account" and click "Other"


<<<<<<<<<<<<<<


4. Click "Add Mail Account"


 <<<<<<<<<<<


5. Enter the following information :

Name :   << This is sender name >>
E-Mail :   << Enter your e-mail address >>
Password :   << Enter your password >>
Description :    << This is name for display your mail account >>, check the right side picture!


6. You need to choice which mode do you want to connect with e-mail account

Please enquire your administrator which mode is better for you, but I will suggest using POP.

The following screen you only need to care the Incoming & Outgoing Mail Server :
Incoming Mail Server Host Name is : mail.abchk.com or mail.asa.com.hk or mail.yourdomain.com
Outgoing Mail Server Host Name is : smtp.abchk.com or smtp.asa.com.hk or smtp.yourdomain.com


P.S. Some time when you click "SAVE" it will wait a long time to validation of your account setting, just wait it.


7. After add the account, you should click to the mail account for checking SMTP setting.


<<<<<


8. Click "SMTP"


<<<<<<<<<<<


9. Click the Primary Server "smtp.abchk.com"


<<<<<<<<<<


10. Make sure your outgoing mail server setting have username and password, and server port must using 465, if server port is 25, sometime you can sent out e-mail, but i guess will always fail, depend on your existing internet connection, because most ISP will block the Port 25 for outgoing mail services.


<<<< 465


How to setup Exchange Online / Office 365 e-mail account to your iPhone's

Remark : If you are using Andriod Phone and it can't automatically discovery the setting, please click here to follow the instruction complete your setting.

1. Click "Setting" on your iPhone's

2. Click "Mail, Contacts, Calendars"

3. Click "Add Account"


4. Click "Exchange"


5. Enter your e-mail address, password and description.
Description is what name you want to display on Mailboxes list, check right side picture, such as "iCloud" & "MYS"


6. You can enable what function you need.


7. Check this picture, you will see "MYS" seperate on upper and down side, the difference is upper only show inbox and latest e-mail only, down side will connect to Exchange Online/Office 365 server and show all e-mail and folder


2013年8月19日 星期一

Apple Mac OS X Hotkey and BootCamp

HotKey

Reset PRRAM
 - Turn On Mac
 - Press 4 Key and Hold (Option)+(Command)+(R)+(P)
 - Wait Restart 3 times and boot sound
 - Release Hold Key

Boot Internet Recovery  (Recovery / Reinstall Mac OS)
 - Hold (Option)+(Command)+(R) around 20-30 sec, waiting screen come out.
 - You can connect to Wi-Fi and download Recovery from Internet
 - You can dump harddisk data to Image store to your external harddisk
 - You can get the OS from internet and install again

Boot Menu (Boot from USB, CDROM or Other)
 - Turn on PC
 - Hold (Option)

Boot Safe Mode
 - Turn on PC
 - Hold (Shift) Key

Full Screen Capture
Command + Shift + 3

Select Area Screen Capture
Command + Shift + 4 > Mouse Select Area

*** Command Key = Apple Key ***

BootCamp
What is BootCamp :
BootCamp is a function allow you install Microsoft Windows on your Mac with or without Mac OS.

License :
BootCamp is a tools to help you install the Microsoft Windows not include any Windows License, you should purchase Windows on online store or retail store.

What kind Windows allow to install on my Mac. If you need to purchase the Windows License, you should check which Windows OS allow install on your Mac.
https://support.apple.com/en-hk/HT204048

What should I need to prepare :
1. Your Mac : )
2. Internet Connection for download BootCamp file
3. Windows Source File Image (It require the ISO CD Image file, not CD)
4. 8GB USB Drive

Flow & Step (Official Guide link : http://www.apple.com/support/bootcamp/)
1. Plug the 8GB USB Drive, it should use FAT format
** if you got error on creating drive or you want to format to FAT, you can open Finder > Your Mac > Application > Utility > Disk Utility > Erase and choose FAT

2. Get ready the Windows ISO image file, if you only have CD, your should make a ISO image from CD.

3. Open Finder > Your Mac > Application > Utility > BootCamp
 -  You will see 3 checkbox :
 -  The first is create Windows Installation USB, this action will format your USB drive.
 -  Second is download BootCamp tools and software from internet to your USB, this action will not erase any file from USB,
 - The last is start the Bootcamp install or remove Microsoft Windows, you should use third options to install the Microsoft Windows. because direct boot from CDROM or USB your Mac keyboard and touch pad may not working, that mean you can't install the windows.

 - If you do it at first time, pleases check all box create Disk image to your USB, download driver and start the installation.

Remark : Don't use the BootCamp USB created by another Mac, it will got problem on installation such as keyboard mouse malfunction.

4. Start to install BootCamp will ask the size partition for Windows, if you just want Microsoft Windows on your Mac, please give it half half or any is ok, you can remove all partition on Windows Installation, then it will remains Windows OS only.

Q&A :
Q: After install how can i boot back MacOS
A: Turn On your Mac with hold "option" key, if will pop-up boot menu for you

Q: After bootcamp with dual OS, how can i remove Microsoft Windows, remain Mac.
A: On Mac bootcamp third option you can remove Windows

Q. After bootcamp with dual OS, how can i remove Mac remain Windows.
A. you can just simple remove the Mac OS partition on Windows, but combine the free space on windows you should try "Control Panel > Administrative Tools > Computer Management > Disk Management", i did not test, if can't combine the front free space to windows partition, you should find third party software to combine it.

Q. After bootcamp and only Windows only, how can i install Mac OS
A. You can use Internet Recovery to restore the Mac OS like new purchase status, but you can't add Mac OS on existing Windows.

2013年4月2日 星期二

Puzzle & Dragon 首次課金 iTunes 需知!

前提 :
安裝PAD需要使用日本 iTunes帳號才可以安裝!而課金的帳戶必需擁有PAD才可以在GAME內購買,這表示你必需擁有一個已購買PAD Game及可輸入有效信用咭的iTunes帳號!

1. 建立日本帳號而無需輸入日本信用咭資料!
 - 開啟 iTunes, 注意必需登出, 在iTunes Store的最右下角點選 "國別" 的圖案

 - 選擇日本

- Search PAD, 找到Puzzle & Dragon,Click "Free"

- 登入時, 選擇 "Create Apple ID"

- 這樣便會出現可選擇 <none> 信用咭建立帳戶
 

2. 購買免費的Puzzle & Dragon
 - 完成購買Puzzle & Dragon

3. 更改 iTunes帳號的Country從日本到香港

4. 輸入信用咭資料

5. 解封 iTunes帳號
 - 首次購買石時iTunes帳號必會被 Apple封鎖,坊間傳聞因購買金額較大為保障而被封了,我見過有朋友買3石亦被封,相信是Apple針對此遊戲保護玩家帳號吧了,封鎖只會是首是被封,解封後不會再出現被封的情況!

請到以下網址 :
https://expresslane.apple.com/Issues.action

按 Continue後,選擇 E-Mail, Email內註明你的 Apple iTunes ID無法使用 Puzzle & Dragon內的內建購買功能,兩個工作天內便會被解封


注意 :
 ﹣ 不要以為信用咭才會被封鎖,只要是新 iTunes帳號及帳號從未有信用咭購買的紀錄均會被封鎖,即是 iTunes Gift Card包括日本的Gift Card均會被封!
 ﹣日本 iTunes帳號只能使用Japan Credit Card 及 Gift Card, 香港 iTunes帳號只能使用 HK Credit Card及Gift Card
 ﹣ 只要你的 iTunes帳號可以轉國別便無需建立新的iTunes帳戶,小弟因購買了iTunes Match便無法更改國別需建立另一個iTunes帳號
 ﹣ 帳戶被封鎖, 一般需要2個工作天才可解封,需要注意是工作天!所以需要課金彩石抽蛋請於一星期前準備及購買, 如今天是星期四, 星期六日神up, 基本上你趕唔切解封, 好大機會星期一才會被解封帳號!

OS X How to Automatically Map Network Drive

本提目我們分為兩部份 :
 ﹣ 如何連接到Network Drive  (Step 1 to 5)
 ﹣ 登入後如何自動連接Network Drive (Step 6 to 9)


1. Finder  >  Go >  Connect to Server 

2. 輸入 Server Address
 e.g. : smb://192.168.2.3    or    afp://192.168.2.3   (如Windows Server請使用smb)


3. 連結Share Folder時需輸入使用者名稱及密碼,注意勾選Add to Keychain的話,下次進入便不會再詢問密碼

4. 選擇連接到 Server 的那一個 Share Folder


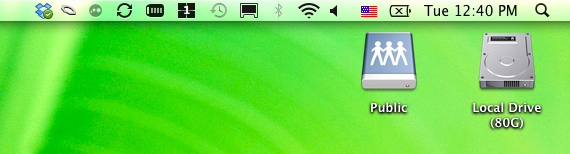
5. 連接後 Desktop 會出現 Share Folder 的 Drive


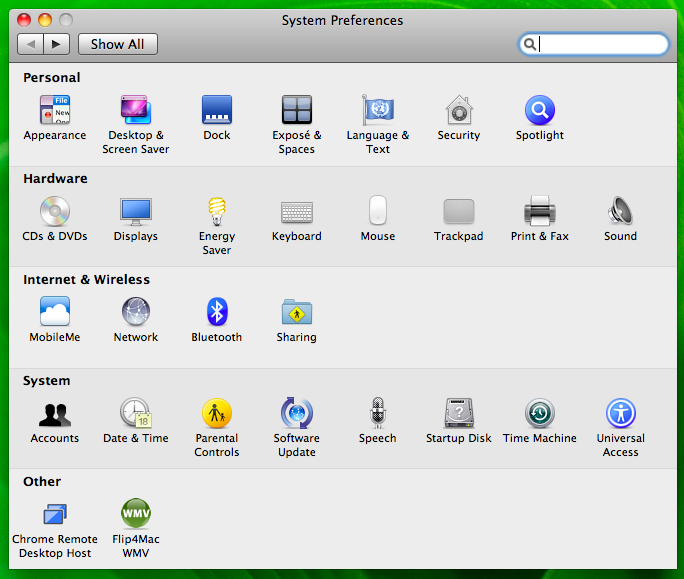
6. Apple > System Preferences


7. Accounts


8. Left Panel "My Account" 選擇登入的帳戶, Right Side 選擇 "Login Items" Tag
 - 選擇後會看見這個User登入後會自動執行的項目

9. 把Desktop 的 Network Drive拉進登入項目便可